
Start with the right tools
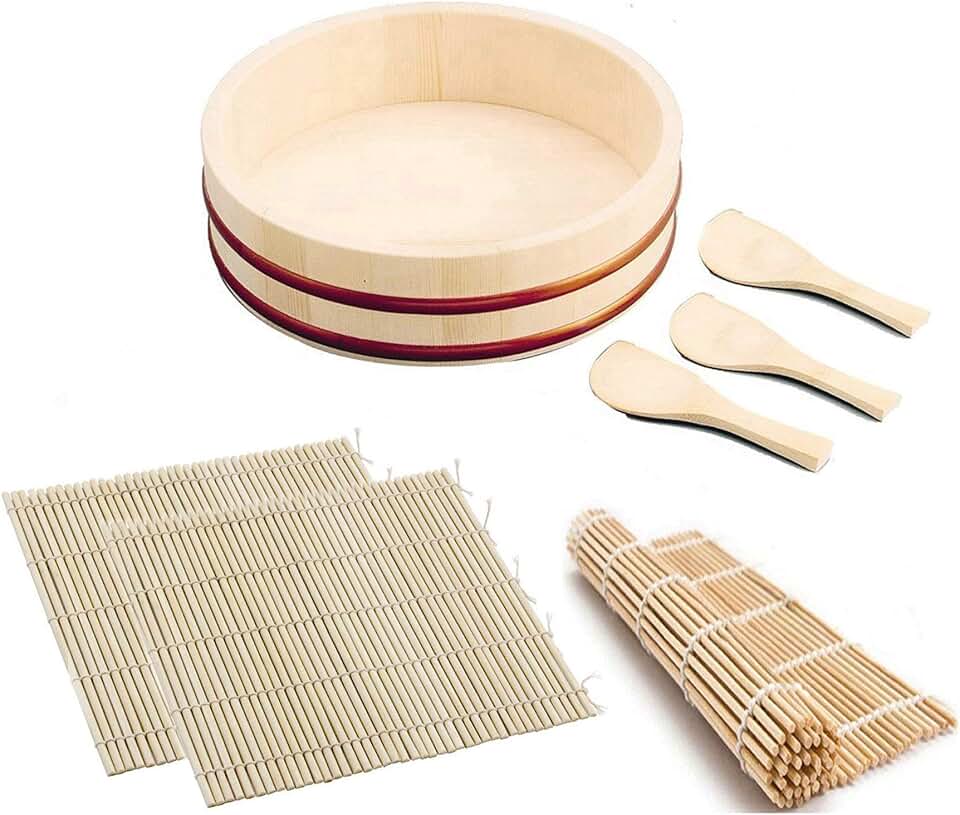
Building a refined sushi palate begins with the mechanics of the roll. If your tools are dull or your technique is clumsy, the delicate balance of flavors gets lost in a messy, compressed cylinder. You don't need a professional kitchen, but you do need three non-negotiable items to keep your sushi Palate intact and your rolls tight.
First, grab a bamboo rolling mat. These mats provide the tension needed to shape the rice without it sticking to your hands. If you are new to rolling, place a sheet of plastic wrap over the mat to prevent rice from wedging into the slats, making cleanup instant. Second, invest in a sharp, single-bevel knife. A dull blade will tear the nori and crush the fish, ruining the texture before you even taste it. If a traditional yanagiba feels too expensive, a high-carbon chef's knife works well, provided you keep it honed. Finally, use a wooden rice paddle (shamoji) and a wide, flat tub for mixing. Metal spoons can heat up the rice or react with the vinegar, altering the flavor profile you are trying to master.


As an Amazon Associate, we may earn from qualifying purchases.
These tools act as the foundation for your sushi Palate. They allow the ingredients to shine without distraction. When the roll holds its shape and the fish remains pristine, your taste buds can focus on the subtle differences in rice vinegar, fish fat, and nori crispness. Start simple, keep your gear clean, and let the tools do the heavy lifting.
Prepare sushi rice correctly
The foundation of a refined sushi palate starts with the rice. It is not just a carrier for the fish; it is the primary ingredient that defines the texture and flavor profile of every roll. If the rice is sticky, mushy, or cold, the delicate balance of your sushi is lost before you even taste the topping. Getting the grain structure right separates a home meal from a professional standard.
Place short-grain Japanese rice in a large bowl and cover with cold water. Swirl the rice with your hand to release the surface starch, then drain the cloudy water. Repeat this process three to five times until the water runs nearly clear. This step is non-negotiable for achieving the distinct, separate grains that define good sushi rice.
Use a 1:1.1 ratio of rice to water for a standard rice cooker, or slightly less water if using a pot. Allow the rice to soak for 30 minutes before cooking to ensure even hydration. Cook until the grains are tender but still hold their shape. Avoid overcooking, which turns the rice into a sticky paste that cannot hold its form in a roll.
Transfer the hot rice to a wide, non-metallic bowl. Drizzle a mixture of rice vinegar, sugar, and salt over the rice. Use a cutting motion with a rice paddle to fold the seasoning in without crushing the grains. The heat helps the rice absorb the vinegar evenly, creating that signature glossy sheen and balanced tang.
Fan the rice while gently spreading it out to cool it down to body temperature. This prevents the rice from becoming soggy and ensures it is comfortable to handle when rolling. Properly cooled rice maintains its structure and provides the right resistance against your hands, making the rolling process much easier.
Mastering this technique ensures your sushi rice provides the perfect canvas for your ingredients. It sets the stage for every subsequent step in building your sushi palate, from rolling to pairing.
Roll your first maki
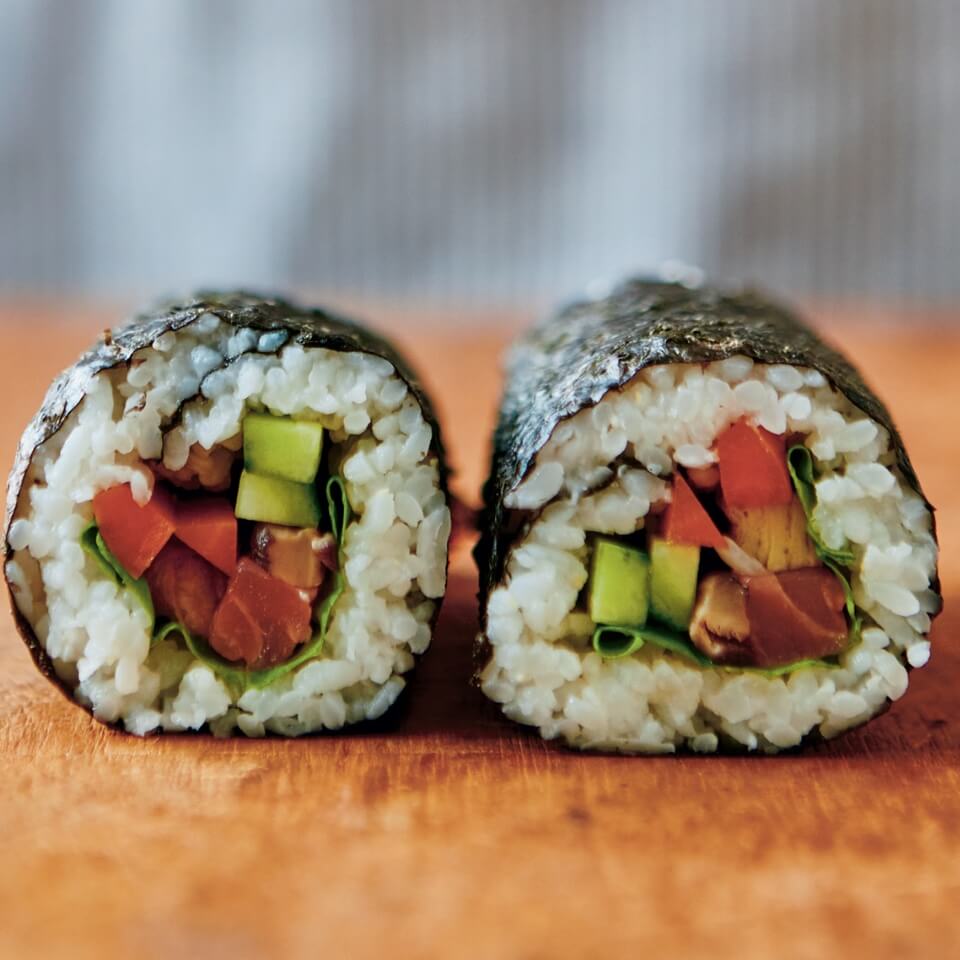
Building a Sushi Palate starts with understanding texture and balance. The maki roll is the most honest test of that skill because there is nowhere to hide uneven pressure or soggy rice. A tight roll holds its shape; a loose one collapses into a mess.
You will need a bamboo rolling mat (makisu), plastic wrap, nori sheets, sushi rice, and your chosen fillings. Keep a bowl of water with a splash of vinegar nearby to wet your hands. This prevents the sticky rice from clinging to your skin while you work.
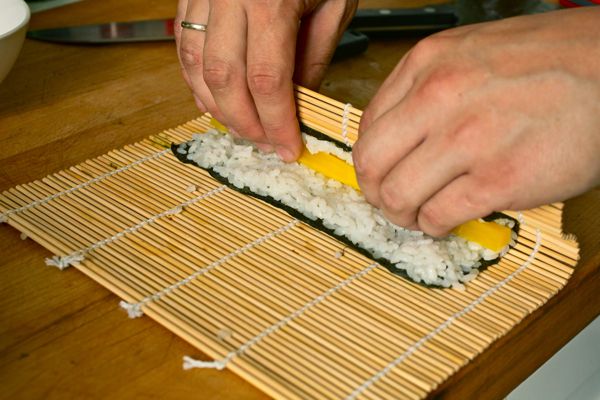
Place a sheet of nori shiny-side down on the bamboo mat. Wrap the mat tightly in plastic wrap to prevent sticking. Wet your hands, then grab about 3/4 cup of sushi rice. Spread it evenly over the nori, leaving a 1-inch strip of bare nori at the top edge. Press gently; you want a uniform layer, not a thick brick.
Place your fillings in a horizontal line across the center of the rice. Keep the line narrow. If you crowd the roll, the nori will tear when you try to close it. Thin slices of cucumber, avocado, or raw fish work best. Avoid bulky ingredients that push outward too hard.
Lift the edge of the bamboo mat closest to you. Bring the nori up and over the fillings, tucking the edge of the nori firmly against the rice on the far side. Use the mat to hold the fillings in place while you complete the tuck. This is the most critical moment for shape.
Continue rolling forward, using the mat to apply even pressure. Squeeze the mat around the roll with your fingers to compact the rice and fillings. The roll should feel firm, like a firm handshake. If it feels soft, it will fall apart when sliced.
Finish the roll by pressing the bare 1-inch strip of nori onto the rice to seal it. Wet your hands again, then use a sharp, wet knife to slice the roll in half. Cut each half into three or four pieces. Wipe the knife between cuts for clean edges.
The goal is a cylinder that holds together without falling apart. If your first few rolls look lopsided, that is normal. The technique relies on muscle memory, not perfection. Focus on the tuck in step three; if that seal is tight, the rest follows naturally.
Choose sustainable sushi grade fish
Buying the right fish is the most critical step in making safe, high-quality sushi at home. "Sushi grade" is not a legal term defined by the FDA, but rather an industry label for fish that has been handled and frozen to kill parasites. When you select fish for your sushi palate, you are looking for safety and freshness, not just a specific label.
The FDA recommends freezing fish at -4°F (-20°C) or below for at least seven days to kill parasites. This process is standard for most commercially sold raw fish. You can often find fish labeled "sashimi grade" or "sushi grade" at reputable fish markets or high-end grocery stores. These vendors have typically already completed the necessary freezing process.
Sustainability matters because overfishing impacts ocean health and long-term food security. Look for certifications from the Marine Stewardship Council (MSC) or the Aquaculture Stewardship Council (ASC). These labels indicate that the fish was sourced responsibly. Choosing sustainable options ensures that your hobby doesn't contribute to depleted stocks.
Here is a quick guide to choosing your fish:
| Fish Type | Best For | Sustainability Note |
|---|---|---|
| Salmon | Nigiri, Rolls | Farmed salmon is widely available and consistently safe if frozen properly. |
| Tuna (Yellowfin/Bigeye) | Nigiri, Sashimi | Wild-caught; check for MSC certification to ensure responsible sourcing. |
| Sea Bass (Suzuki) | Nigiri | Often farmed in Europe; verify freezing standards with your supplier. |
| Shrimp (Amaebi) | Nigiri | Usually served raw but cooked in some regions; ensure it is sushi-safe. |
When in doubt, ask your fishmonger. They can tell you the origin and freezing history of the fish. This transparency is the best way to ensure your sushi is both safe and delicious.
Pair drinks to cleanse the palate
Many sushi eaters treat the pickled ginger as a palate cleanser, but this is a common misconception. The ginger is actually a flavor bridge, meant to reset your taste buds between different types of fish or between nigiri and sashimi. It should not be used to wash away the taste of a heavy roll before the next bite.
To truly cleanse your palate and refine your Sushi Palate, you need something that cuts through oil and fat without adding competing flavors. A Japanese highball is an excellent choice. The carbonation and mild bitterness of the soda water refresh the mouth, preparing it for the next piece of sushi.
Green tea also works well for this purpose. The tannins in the tea help neutralize strong flavors, allowing you to taste the subtle nuances of the next piece. Avoid sweet drinks or heavy beers, which can coat the tongue and dull your ability to detect delicate fish flavors.
Pickled ginger resets your palate between different fish types. Use tea or a highball to clear heavy flavors between courses.
Check Your Roll Before Serving
Before you plate your sushi, give each roll a quick inspection. A tight, even roll not only looks professional but ensures every bite has the right balance of rice, filling, and nori. If the roll falls apart at the table, the experience is ruined before the first bite.
Start by examining the seam. It should be sealed firmly against the body of the roll, with no gaps where rice or fish might escape. If the nori is loose, the roll was likely not rolled with enough pressure or the seam wasn't moistened properly before finishing. A secure seam keeps the ingredients contained and the structure intact.
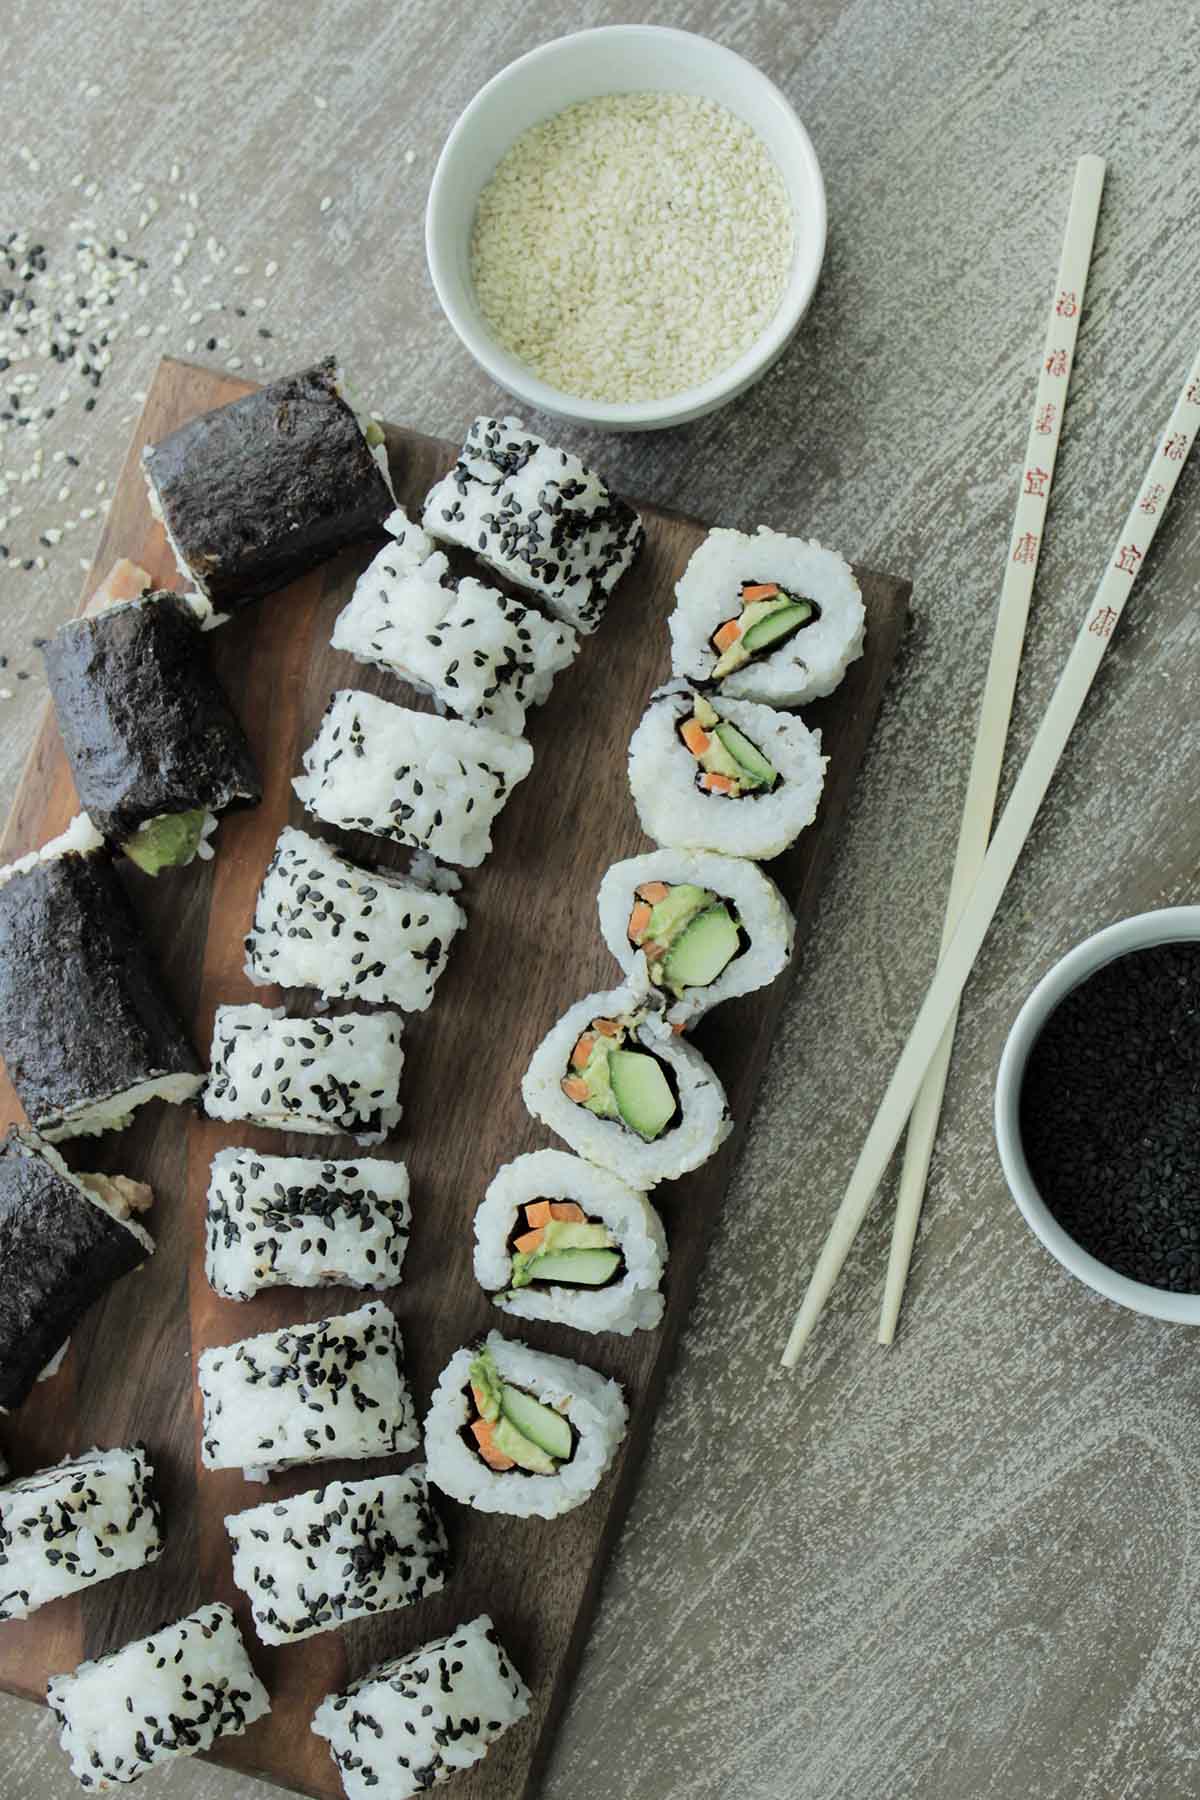
Next, check the cuts. Slices should be clean and uniform, revealing the filling clearly without crushing the rice. If the rice is mashed or the nori is torn, your knife may have been dull or dragged through the roll instead of slicing through it in one confident motion. Clean cuts signal care and precision, inviting the diner to appreciate the layers inside.
Finally, ensure the presentation is neat. Wipe away any stray grains of rice or smudges of sauce from the plate. A clean plate highlights the sushi, allowing the colors of the fish and vegetables to stand out. This attention to detail reflects the discipline of a good sushi palate, turning a simple home roll into a dish worthy of a restaurant table.
-
Seam is sealed tight with no gaps
-
Cuts are clean and uniform
-
Rice is not crushed or mashed
-
Plate is wiped clean of stray grains
Common rolling mistakes to avoid
Even with the best sushi rice, a few technical hiccups can turn a clean roll into a kitchen mess. Fixing these issues early keeps your sushi palate sharp and your rolls intact.
Rice sticks to your hands
Wet your hands with tezu (vinegar water) before touching the rice. Dry hands act like glue, pulling grains away from the nori and leaving uneven patches. Keep a small bowl of tezu nearby and dip your fingers between every few grains.
Nori gets soggy
Moisture is the enemy of crisp nori. If you are making rolls ahead of time, keep the nori and rice separate until the last minute. Wrap the finished roll tightly in plastic wrap and let it rest for 10 minutes before slicing. This sets the shape without steaming the seaweed.
Roll is too loose
A loose roll unravels when you slice it. Apply even pressure along the bamboo mat, starting from the far edge and rolling toward you. Squeeze gently but firmly for a few seconds at the end to lock the shape. Think of it as hugging the roll, not crushing it.
Slices are ragged
Dull knives crush the rice and tear the nori. Use a sharp, long blade and wipe it clean between every cut. Dip the blade in water or vinegar water before each slice to prevent sticking. This keeps the edges clean and the presentation sharp.
Frequently asked questions about sushi
Building a sushi palate is less about memorizing rules and more about understanding how flavors interact with your taste buds. The ginger served with your meal is often misunderstood; while some believe it cleanses the palate between every bite, it is primarily a traditional accompaniment rather than a strict reset button. Instead, focus on how different textures and temperatures shift your perception of the fish.
Many home cooks wonder if a highball or specific drink works better than ginger to refresh the palate. A crisp Japanese highball can actually prepare your mouth for the next piece more effectively than pickled ginger alone. By adjusting what you drink and how you eat, you can train your senses to detect subtle nuances in the rice seasoning and fish quality.
No comments yet. Be the first to share your thoughts!