

Prep your rolling station
A clean, organized workspace is the difference between a tight, professional roll and a sticky mess. To achieve the precision expected of a true Sushi Palate, set up your station before you touch the rice. This prevents sticking, ensures hygiene, and keeps your workflow efficient.
Clear and sanitize your surface
Start with a clean, dry countertop. Sushi rice is sticky and high in moisture; any residual water or oil will cause the rice to adhere to your mat or hands. Wipe down your workspace with a damp cloth and dry it thoroughly. If you are working with raw fish, ensure your cutting board and knife are sanitized to prevent cross-contamination.
Prepare your tools
You will need a bamboo rolling mat (makisu), a sharp knife, and a bowl of water mixed with a splash of rice vinegar (su). The vinegar-water mix keeps your hands from sticking. Place your bamboo mat on a clean cutting board or plastic wrap if you want to protect the mat from rice grains getting stuck in the slats. Have a damp cloth handy to wipe your hands and the knife between rolls.
Set up your ingredients
Arrange your fillings and nori within easy reach. Keep your nori sheets away from moisture until you are ready to roll. If you are using sliced vegetables or fish, have them prepped and lined up in small bowls or on a plate. This "mise en place" approach allows you to focus on the rolling technique rather than searching for ingredients mid-process.



As an Amazon Associate, we may earn from qualifying purchases.
Cook and season the rice
The foundation of the sushi palate is the rice. It must be sticky enough to hold its shape but distinct enough to separate on the tongue. If the grains clump into a gluey mass, the texture of every roll suffers. Achieving this balance requires precise water ratios, careful cooking, and a specific seasoning technique.
Start with high-quality short-grain Japanese rice. Place it in a bowl and cover with cold water. Swirl the grains with your hand; the water will turn cloudy with starch. Drain and repeat this process 5 to 7 times until the water runs nearly clear. Excess starch causes the rice to become gummy rather than sticky, ruining the delicate mouthfeel required for the sushi palate.
Soak the washed rice in the cooking water for 30 minutes. This allows the grains to absorb moisture evenly, ensuring they cook through without becoming mushy on the outside. Use a 1:1.1 ratio of rice to water. Bring to a boil, then immediately reduce to the lowest possible heat. Cover tightly and simmer for 12 minutes. Remove from heat and let it sit, covered, for another 10 minutes. Do not lift the lid during cooking.

While the rice cooks, mix your seasoning. A standard blend uses rice vinegar, sugar, and salt. Heat the mixture gently just until the solids dissolve; do not boil. Let it cool to room temperature. The balance should be sharp and tangy, not sweet like dessert rice. This dressing provides the acidic kick that cuts through the richness of the fish and defines the traditional sushi flavor profile.
Transfer the hot rice to a wide, non-metallic bowl (traditionally a hangiri or wooden tub). Drizzle the vinegar mixture over the rice in a zigzag pattern. Use a rice paddle to cut through the rice and fold it over, mimicking a chopping motion. This technique coats every grain without crushing them. Fan the rice while folding to cool it quickly to body temperature. The rice should shine and have a glossy, slightly sticky texture.
Once seasoned, cover the rice with a damp cloth to prevent it from drying out. It should remain at room temperature until you are ready to roll. Cold rice hardens the grains and makes them difficult to shape, while hot rice will burn your hands and cook the nori prematurely.
Assemble the inside-out roll
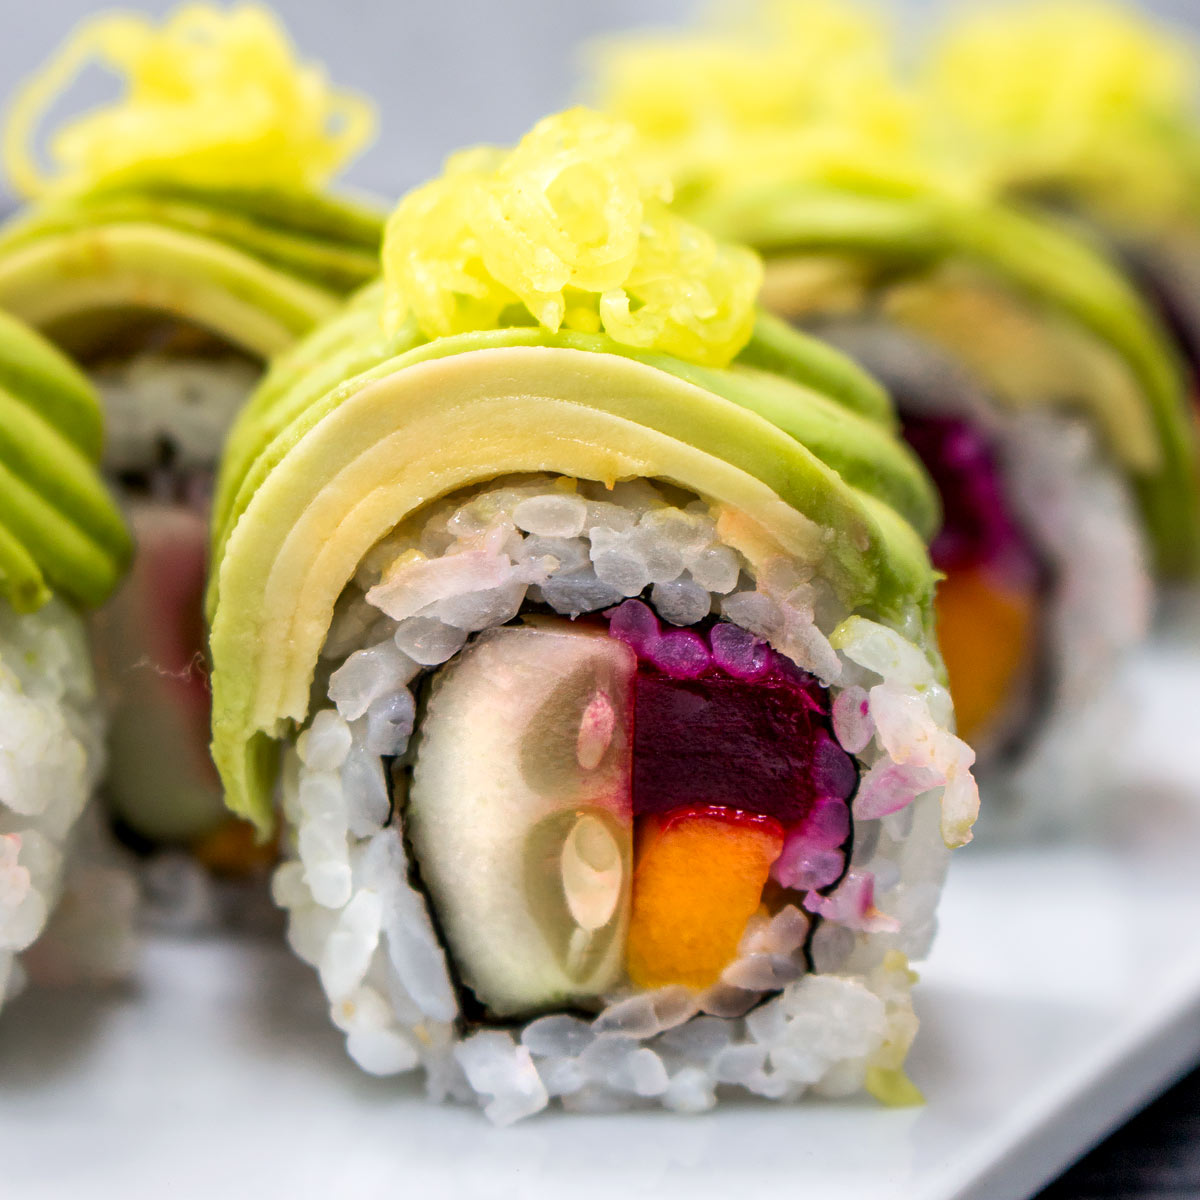
An inside-out roll, or uramaki, flips the traditional structure by placing the rice on the exterior and the nori on the inside. This style is forgiving for beginners because the rice hides minor imperfections in the nori placement, allowing you to focus on the rolling mechanics rather than perfect sheet alignment.
The technique requires a slightly different approach than a standard maki roll. You must manage the stickiness of the rice carefully to ensure the roll holds its shape without tearing the nori or sticking to your hands. Precision is the goal here; each component must be placed with intention to create a balanced bite.
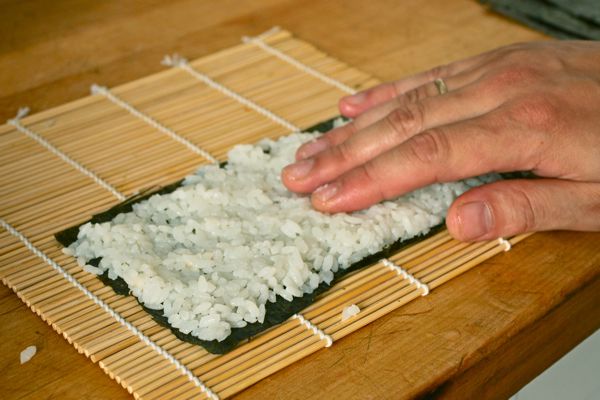
Lay a full sheet of nori on your bamboo mat, shiny side down. Flip the sheet over so the matte side faces up. This is your working surface. Dampen your hands with water and vinegar, then gently press a thin, even layer of sushi rice onto the nori. Leave a 1-inch strip of bare nori at the top edge; this will act as the glue to seal the roll later. Do not pack the rice too tightly, or the roll will be dense and hard to cut.
Place your fillings—such as cucumber, avocado, or crab—in a horizontal line across the center of the rice. The key to a clean cut is restraint. If you pile too much filling, the roll will burst open when you squeeze it. Keep the filling line narrow and centered. You want the rice and nori to do the heavy lifting in holding the roll together, not the ingredients.
Lift the edge of the bamboo mat closest to you. Using your thumbs to hold the fillings in place, fold the nori over the filling. Tuck the nori edge firmly under the fillings, creating a tight cylinder. Lift the mat slightly and continue to roll forward, applying gentle, even pressure. The goal is to encase the filling completely without crushing it. Stop just before the bare nori strip at the top.
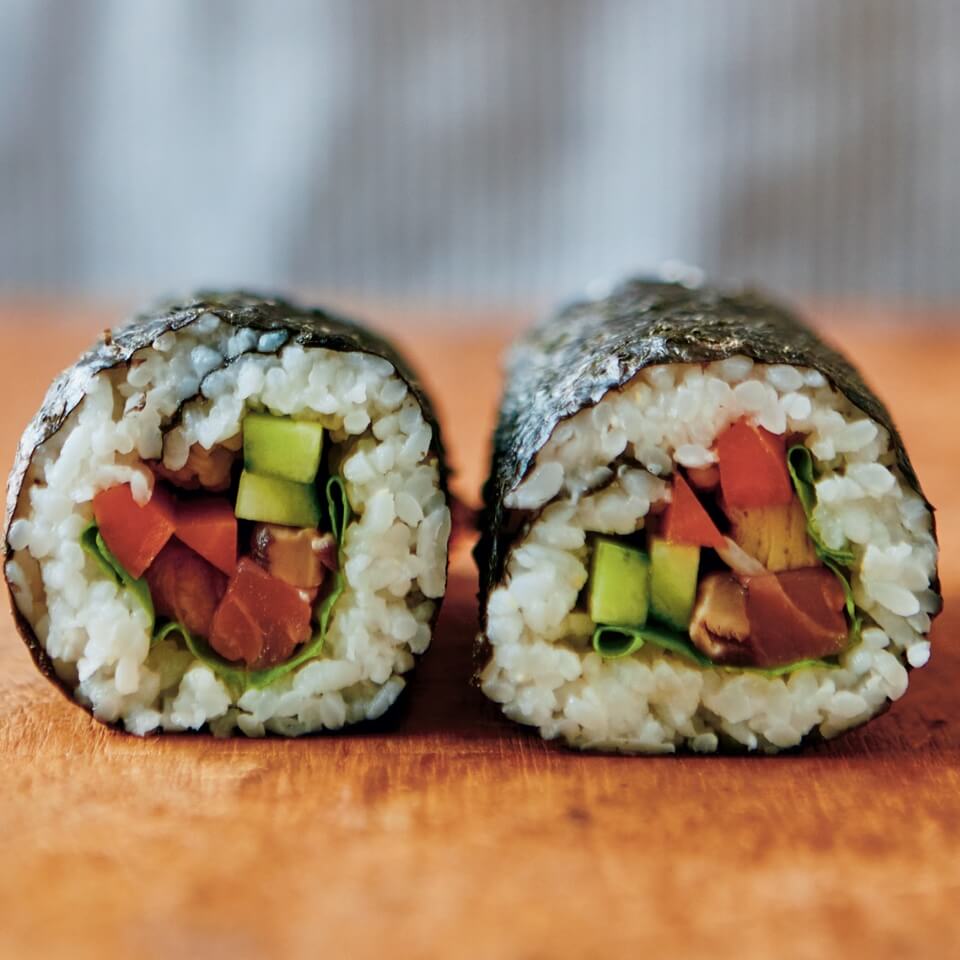
Dip your finger in water and run it along the bare strip of nori at the top edge. This activates the starch, making the nori sticky. Complete the roll by pressing the wet nori edge down onto the rice to seal it. Gently squeeze the roll along its length with the bamboo mat to ensure it is compact and cylindrical. A loose roll will fall apart when sliced. Let it rest for a minute to set.
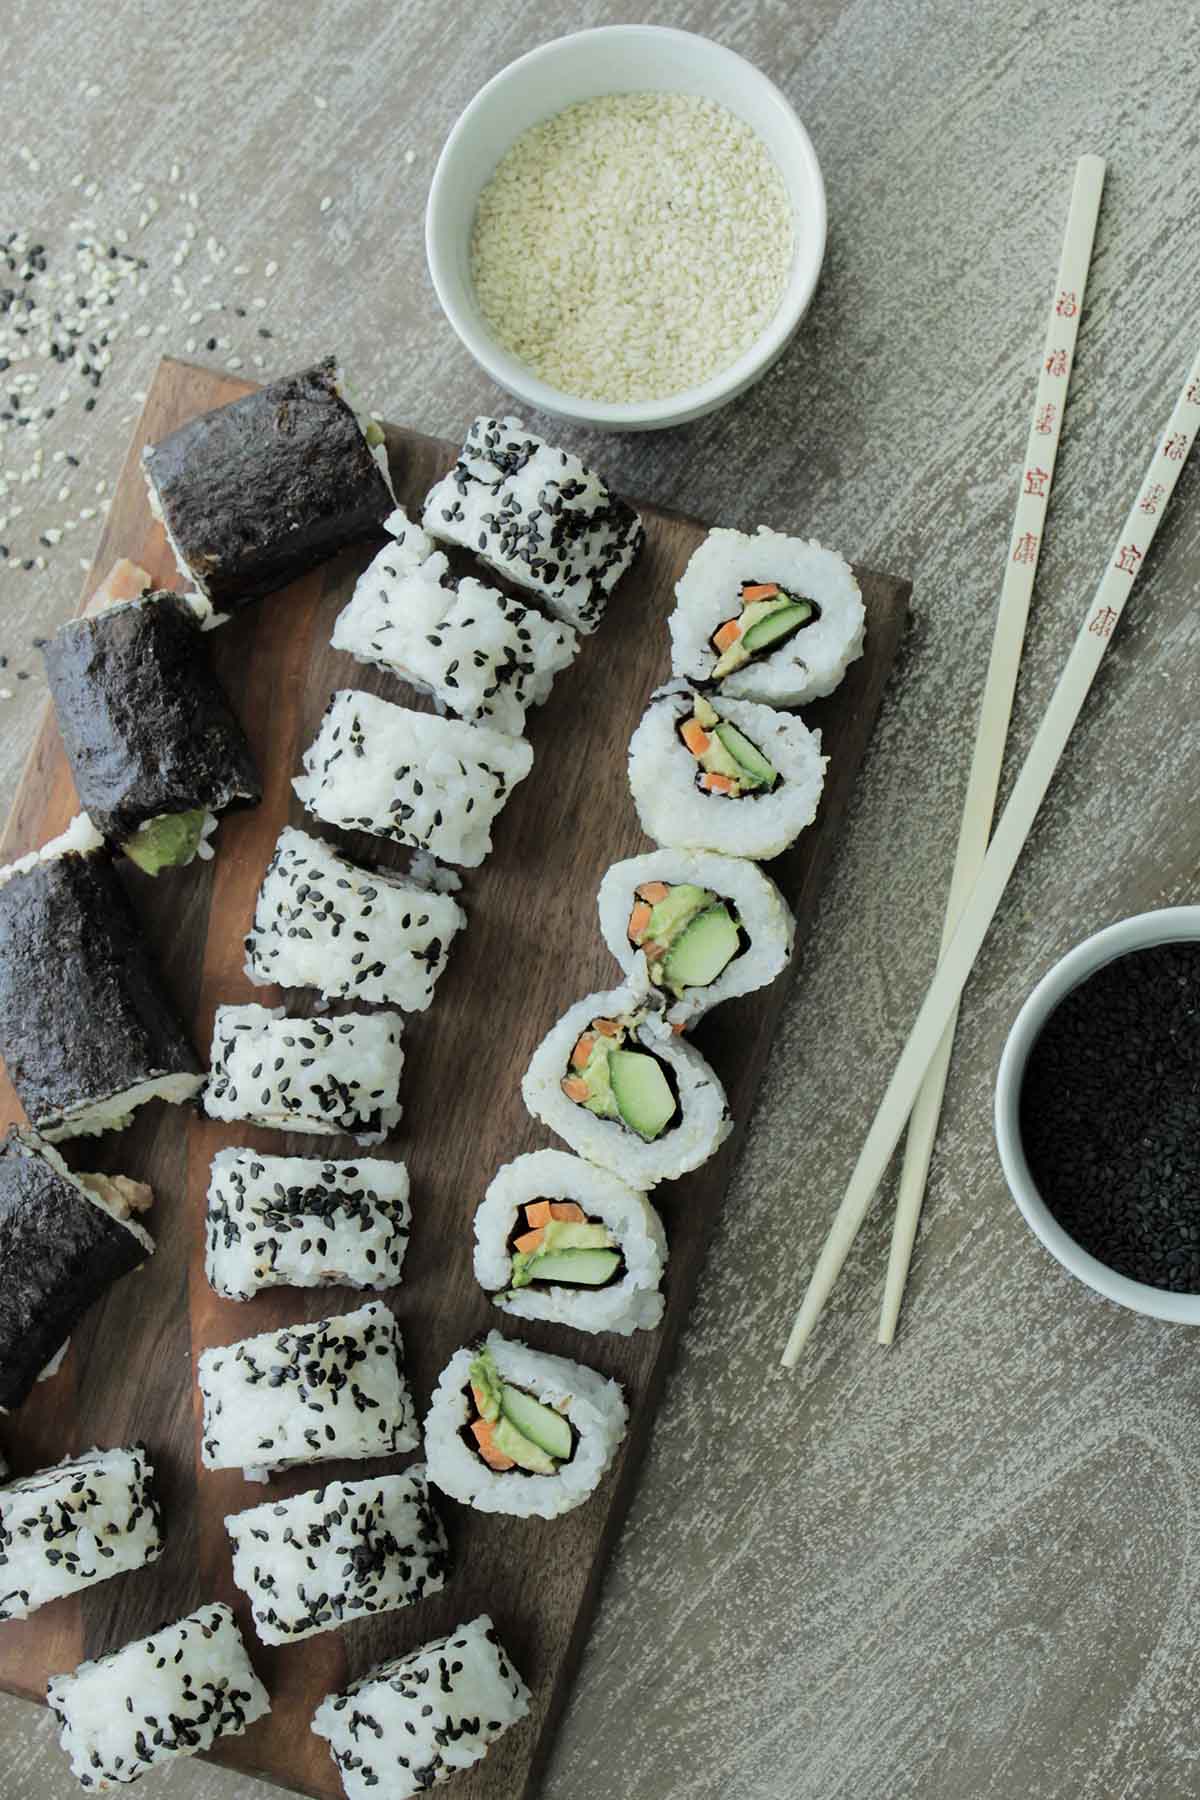
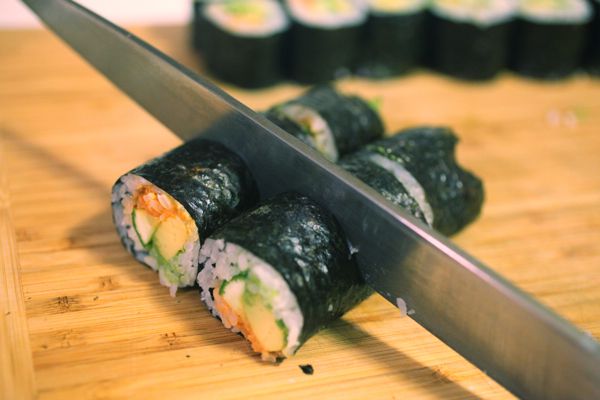
Use a very sharp knife, ideally a long yanagiba or a sharp chef's knife. Wet the blade before each cut to prevent the rice from sticking. Saw through the roll gently; do not press down hard, or you will flatten the cylinder. Cut the roll in half first, then align the halves and cut again to make quarters. For a six-cut roll, cut the halves in half again. Wipe the knife clean between cuts for the cleanest edges.
The finished uramaki should stand upright on its rice exterior, revealing the colorful ring of fillings inside. This structure not only looks professional but also provides a textural contrast between the soft rice and the crisp nori interior. Mastering this roll is a significant step toward developing your sushi palate, as it requires control over both moisture and pressure.
Slice and plate carefully
The final cut defines the Sushi Palate. A clean slice reveals the integrity of your roll, while a messy one suggests the rice was too sticky or the knife was dull. Precision here separates a home cook from a practitioner.
Use a sharp, long-bladed knife. Wet the blade with water or rice vinegar before every cut to prevent the nori and rice from sticking. This simple step keeps the edges crisp and the interior intact.
Dip your knife in a small bowl of water or rice vinegar. Shake off excess drops. A wet blade glides through the nori without dragging the rice, ensuring each piece holds its shape.
Place the roll on a cutting board. Do not press down. Use a gentle back-and-forth sawing motion. Cut through the roll in one continuous motion to avoid crushing the filling.
For a standard roll, cut it in half first, then align the halves to cut into four equal pieces. Wipe the blade clean between cuts if rice begins to accumulate. This ensures uniform presentation.
Place the slices on a plate with the cut side facing up. This displays the cross-section of your ingredients. Arrange them slightly overlapping or in a neat row. Add wasabi and pickled ginger on the side to complete the visual balance.
The goal is not just to feed, but to present. When the rice grains are distinct and the nori is unbroken, the Sushi Palate recognizes the effort. Clean cuts invite the diner to appreciate the layers within.
Common rolling mistakes
A refined sushi palate relies on precision, and that starts with a structurally sound roll. Even experienced rollers encounter issues like loose maki or soggy nori. These problems usually stem from simple technique errors that are easy to correct once you know what to look for.
Loose rolls
A loose roll happens when the nori sheet doesn't hold its shape, causing the filling to spill out when sliced. This often occurs because the rice layer is too thick or uneven, preventing the nori from gripping tightly. To fix this, spread a thin, consistent layer of rice, leaving a one-inch border at the top. When rolling, apply even pressure with your fingers along the entire length of the mat to ensure the nori seals securely.
Soggy nori
Soggy nori ruins the texture contrast that defines a good sushi roll. The seaweed absorbs moisture from the rice or wet fillings too quickly, becoming chewy and unpleasant. To keep the nori crisp, assemble the roll just before serving. If you are making rolls in advance, store the nori and rice separately and combine them right before eating. Avoid placing wet ingredients like cucumber directly against the nori; instead, layer them slightly inward.
Sushi Rolling Checklist
Before you place a grain of rice on the mat, verify you have everything within arm's reach. Precision in rolling depends on preparation, not speed. If you’re hunting for nori while your rice is cooling, the texture suffers.
Use this quick reference to gather your tools and ingredients. Once checked off, you can focus entirely on the roll.
-
Bamboo rolling mat (makisu)
-
Sharp sushi knife
-
Small bowl of water
-
Sushi rice (seasoned)
-
Nori sheets
-
Fillings (fish, vegetables, etc.)
-
Soy sauce, wasabi, pickled ginger
Sushi rolling: what to check next
The goal of the sushi palate is precision. Every roll should respect the fish and the rice. These answers help you handle raw ingredients safely and keep your rolls clean.
Is store-bought sushi fish safe to eat?
Most fish sold for sushi is not actually "raw" in the traditional sense. It has been flash-frozen to extremely low temperatures. This process kills parasites that might live in the flesh. Look for labels that say "sushi-grade" or "sashimi-grade." These terms indicate the fish was handled and frozen to meet safety standards for raw consumption.
How long does sushi rice stay good?
Sushi rice is best used immediately after seasoning. It begins to dry out and harden quickly at room temperature. If you must store it, keep it in an airtight container in the refrigerator for up to one day. Warm it slightly before rolling to restore the sticky texture needed for proper shaping.
Can I freeze leftover sushi rolls?
Freezing cooked sushi rolls is possible, but the texture will change. The nori will become soggy, and the rice may lose its distinct grain. It is better to freeze the fillings separately, such as cooked shrimp or vegetables, and assemble fresh rolls later. Raw fish should never be frozen after being sliced for home consumption.
No comments yet. Be the first to share your thoughts!